Photon Model P3000X: Replacement Parts and Regular MaintenanceUpdated 2 months ago
What are the Puraclenz Photon replacement parts and maintenance schedule?
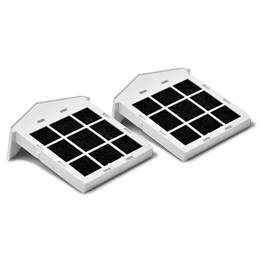
The Puraclenz Photon models has two replacement parts. The Recharge Cell and Photon Pre-Filter.
The Recharge Cell runs for 2 years. It should be replaced every two years to ensure optimal Puraclenz performance. This time duration assumes 24/7 continuous use.
The Photon Pre-Filter needs to be replaced or washed every 6-7 months depending on the air quality of the installation space. This time duration assumes 24/7 continuous use.
What are the Puraclenz Photon maintenance instructions?
How and when to clean or replace the Photon Pre-Filter.
Each Puraclenz Photon model comes with 2 pre-filters. The Photon Pre-Filter is designed to protect the unit's cell from dust and large particulate matter so that it functions properly. Each Pre-Filter (R0001) can be used for up to 6 months before it needs to be cleaned or replaced.
The length of time you can run your Puraclenz Photon model before cleaning the pre-filter depends on how dusty your environment is. We recommend changing/ washing the pre-filter at least every 6 months, more often if your indoor environment is dusty or if you have shedding pets.
It's important to keep your pre-filter dust-free. You can clean your pre-filter by removing it from the unit and gently tapping it upside down into a trash receptacle. You can also run cool tap water through the filter so that the dust is cleared.
Replacing Your Pre-Filter
Pre-Filter Indicator
How to Replace Photon Pre-Filter from Puraclenz on Vimeo.
We recommend replacing or washing the pre-filter every 6-7 months, depending on your environmental conditions.
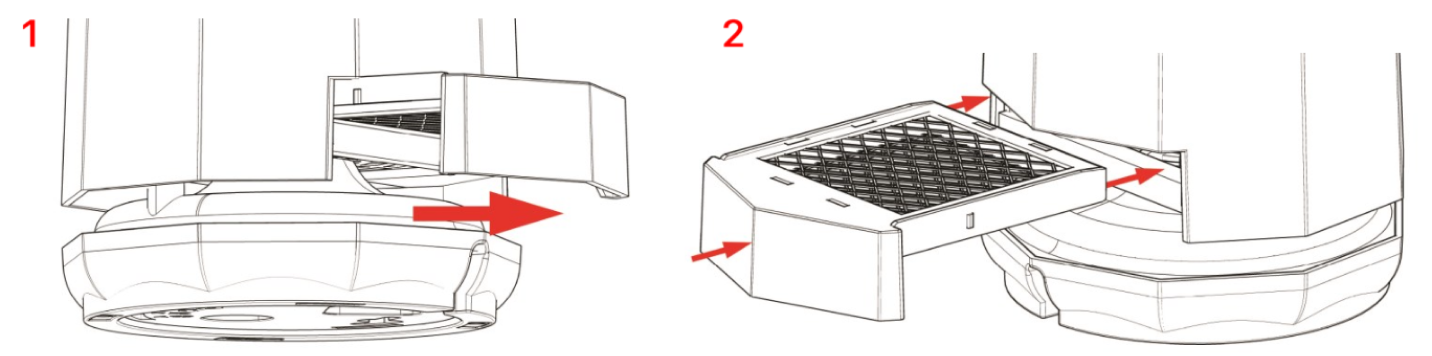
To replace the pre-filter, simply slide the old pre-filter out and discard. Then slide in the new pre-filter (model #R0001) to automatically resume normal operation. See diagrams 1 and 2 below.
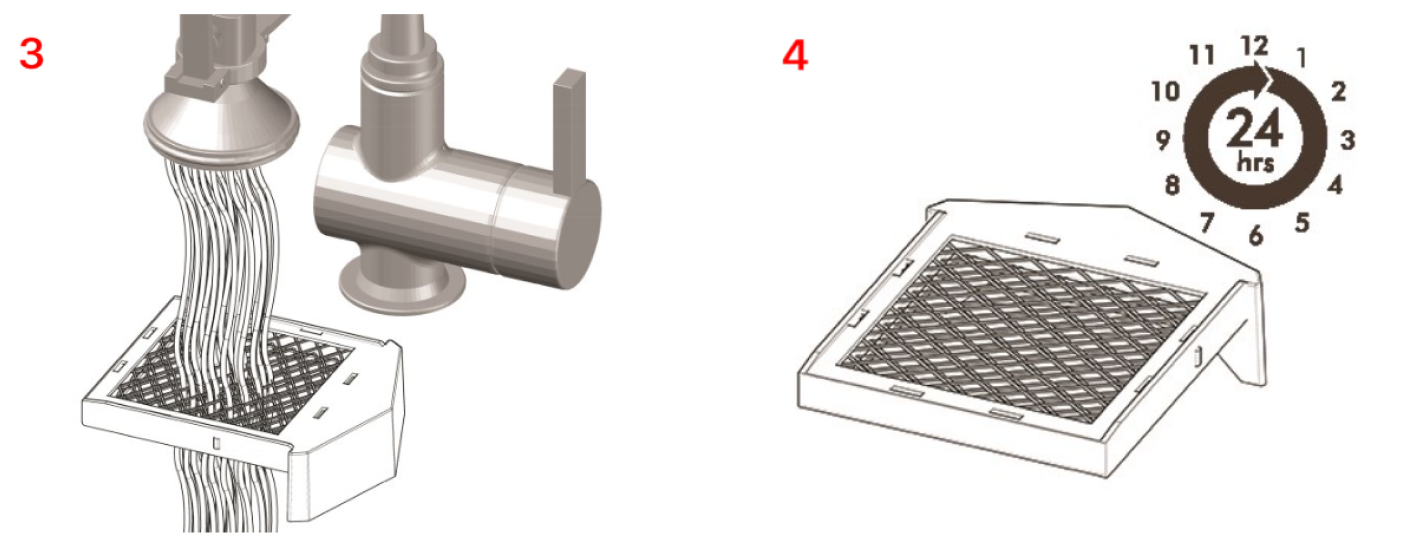
Follow these steps to wash your pre-filter
For best results, it is recommended to always use a brand new pre-filter.
- Slide out the dirty filter and set aside. See above diagram 1.
- Slide in new or clean pre-filter to resume normal operation. See diagram 2. An extra pre-filter comes with every new purifier purchase, it can be found in the contents of the original box packaging.
- Take the dirty pre-filter and run it under a faucet to spray off dust and debris. See diagram 3 below.
- Shake excess water off pre-filter and let it dry overnight. Never install a wet pre-filter into the purifier, it may damage the machine. See diagram 4.
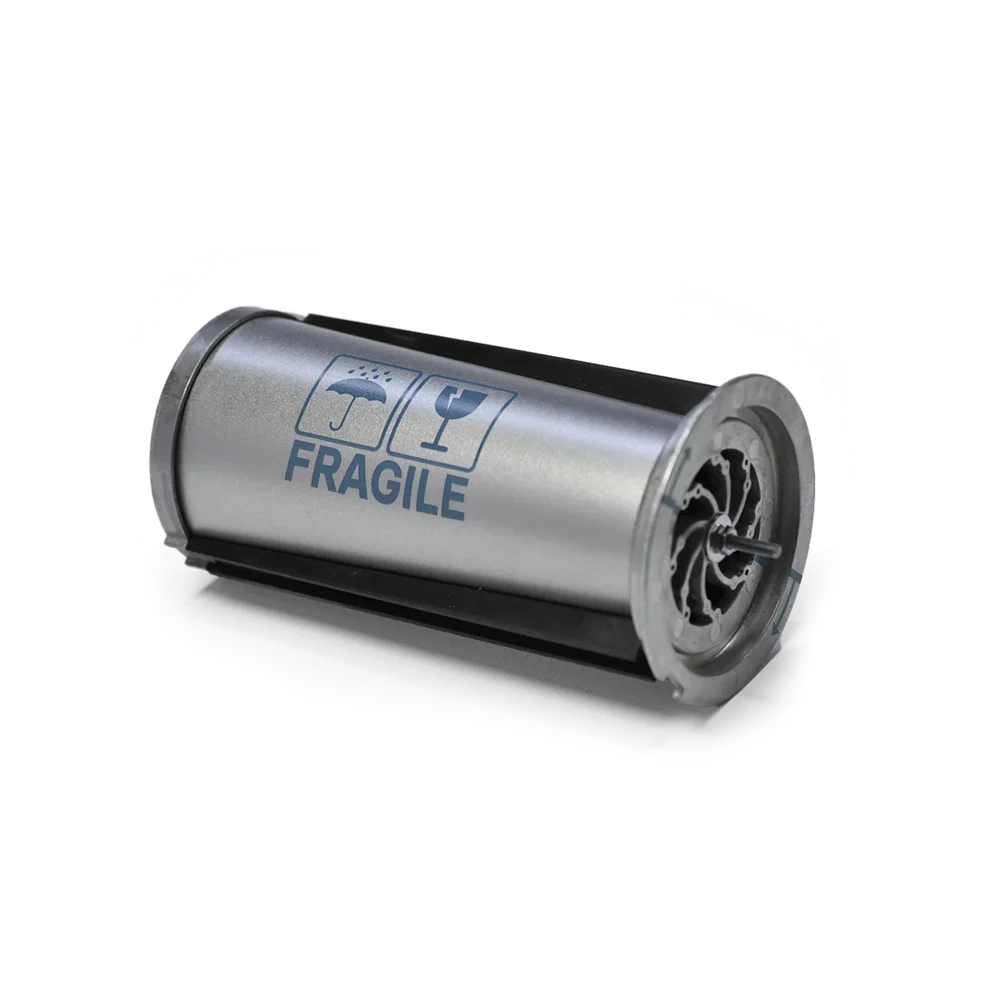
Replacing Your PCO Recharge Cell
Recharge Cell Indicator
How to Replace the Recharge Cell from Puraclenz on Vimeo.
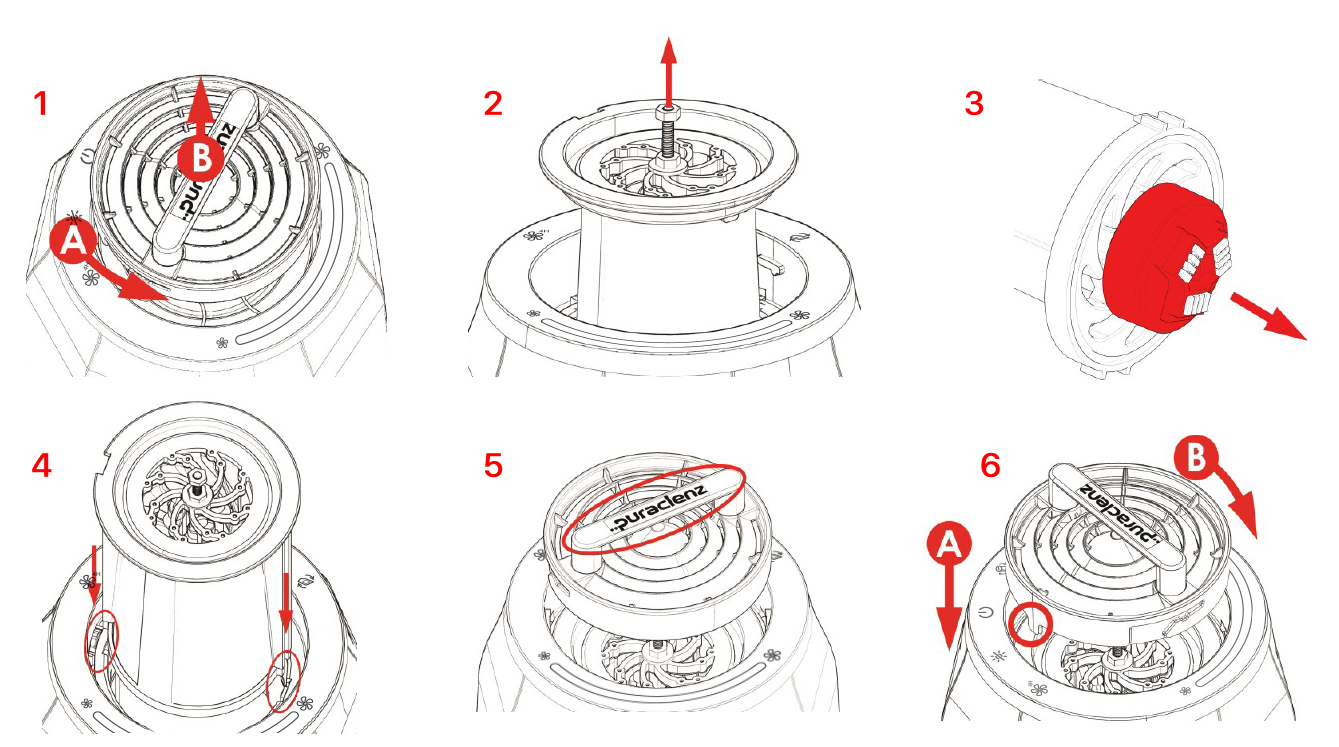
Disconnect power before doing any work to your purifier.
- Turn Top cover counterclockwise (A) and remove (B). Note: if your purifier is ceiling or wall mounted, be careful not to allow the Recharge Cell to fall out when removing the Top Cover.
- Use your fingers or pliers to slide out the old Recharge Cell from purifier and discard.
- Remove Red Cap from the bottom of the new Recharge Cell (Model #R00002).
- Slide new Recharge Cell into purifier by aligning the side channels.
- Align the Top Cover with the Puraclenz logo 30° counterclockwise to the front of the purifier, as highlighted in diagram 5.
- Then place the Top Cover into the purifier as shown in diagram 6. Twist the Top Cover clockwise (b) until you hear an audible click from the safety latch (circled) to automatically resume operation.
Notes and Precautions
The following actions will void the warranty:
- Do not use rough or abrasive cloths or paper towels on the Photon housing. These will scratch the plastic.
- Do not insert foreign objects or your fingers into the unit.
- Do not use petroleum-based cleaners or solvents on this device.
- Do not use alcohol or other solvents on this device.